Monday, December 24, 2012

It's Christmas Eve!


And it is snowing here! It's absolutely beautiful. We will have a white Christmas. I am so excited! Are you?

I meant to post this earlier, to give you more time to make one of your own, but this could still be a potential craft for Christmas Eve (you still have a few shopping hours left).

Remember my pumpkins at Thanksgiving made from old books? Well, I discovered how to make a Christmas tree from an old book. And they go much faster than the pumpkins. Aren't they pretty?


Here are the instructions:
Once again, we start with an old Harlequin romance. The Highwayman and the Lady are about to get in the holiday spirit.


Remove the cover and split into sections of about 50 pages. You can typically get at least two trees out of one of these books. Fold the first page down as shown below. I recommend using a bone folder to get a nice sharp crease.


Now fold up the bottom corner to meet the top corner. If you are working with a taller book, you may need to overlap this bottom fold a bit (see sample pics toward the end of the post).


Now fold the page down again to meet the binding of the book.


Continue on with the rest of the pages. As you go along, it will start to look like this. 


You should end up with two halves, approximately 50 pages or so each.


Now glue the two bindings together. Ignore the rubber cement in the back. I found that hot glue worked better.


And here are the two pieces rejoined.


Now spray on some glitter--I used gold, silver or green but there are some gorgeous glitter sprays out there. Turquoise or bright pink would be beautiful.


Trim your trees with a few accessories or just go for a bare tree. They are pretty plain as well.


I did make a couple of trees with old magazines and larger books to give me a little variety in size. I mentioned above you might need to fold up the bottom flap farther for a taller book. Here is a sample of those folds (and yes that is an old computer programming manual--great way to recycle).


And there you have it. The middle tree in this picture was made from a Martha Stewart Living Magazine. I like the colors the photos added.


I'm giving these out at the family Christmas Eve party. They were easy, inexpensive and I think they turned out really pretty.

And on that note, I wish you all a very Merry Christmas! May it be full of family, friends, fun and fond memories! 

Friday, December 21, 2012

It may not be the end of the world...


but it is the end of the life cycle for some of our Close to My Heart products. And I figured that today, the day after the Mayan calendar ended, would be a great day to publish the retiring products list. The list of products at the end of this post are available until January 31st or while supplies last. And many of the accessories do sell out before the end of January.

So do some last minute Christmas shopping here on my website or directly from me! And don't forget if you order $35.00 in product between now and January 31st, you can get this fabulous goody, Whoo's Your Valentine, for just $10.00.


The stamp set in this kit is worth $17.95 alone and look at how cute it is! All sorts of potential beyond Valentine's Day.


Happy Stamping and Scrapping! Happy Doomsday! Merry Christmas and Happy New Year!

Get them while they last!

Item # Item Description Page # Autumn/Winter 2012 Idea Book
Z1349 Shimmer Designer Brads 127
Z1360 Rhinestone Designer Brads 127
Z1361 Brads Red Assortment  127
Z1362 Brads Pink Assortment 127
Z1363 Brads Blue Assortment 127
Z1364 Brads Green Assortment 127
Z1365 Brads Basic Assortment 127
Z1387 Wooden Designer Buttons 125
Z1391 Buttons Clear Assortment 125
Z1395 Irresistibles™ Eclectic Chipboard Die-Cuts (the alphabet) 130
Z1465 Irresistibles™ Make-It-Count Numbers 130
Z1681 Dimensional Elements  Numbers  131
Z1761 Dimensional Elements Ornaments 131
Z1762 Dimensional Elements Snowflakes 131
Z1765 Color-Ready Arbor Wooden Shapes 130
X7147C Stella Complements Canvas Shapes 68
X7148C My Stickease® Pemberley Assortment 68
X7150C My Stickease® Victory Assortment 69
X7153C My Stickease® Florentine Assortment 69
X7158C La Belle Vie My Stickease® Assortment 38
X7160C Flirty Complements Dimensional Elements 50
X7161C Moonlight Complements Dimensional Elements 56
X7162C Pear & Partridge Complements Glittery Rub-Ons 62
Z1464 Milepost Shapes 128
Z1466 Bling Assortment 128
Z1695 Urban Felt Alphabet  130
Z1696 Keepsake Felt Alphabet  130
Z1709 Just Blooms® Petals Paper Flowers 129
Z1460 Foundry® Ribbon Slides 126
Z1711 Foundry® Binder Clips 126
Z1712 Foundry® Number Plates  126
Z1461 Décor Journaling Spots 129
Z1687 Bohemian Assortment  128
Z1689 Timeless Charms 128
Z1692 Tough Tags 128
Z1694 Bouquet Assortment 128
Z1741 Haunted Assortment 128
Z1749 Autumn Lane Assortment  128
Z1763 Boutique Assortment 128
Z1772 Dimensional Elements In Color—Holiday 128
Z1393 Mini-Medley Accents Black Collection  126
Z1316 Designer Ribbon Cocoa Collection                                                                                 124
Z1385 Designer Ribbon Blue Collection 124
Z1615 Designer Ribbon Red Collection 124
Z1616 Designer Ribbon Green Collection 124
Z1388 Newsprint Rub-Ons  130
Z1700 Dark Chocolate Tapestry Velvet Rub-Ons 126
Z1733 Black Tapestry Velvet Rub-Ons 126
Z1743 Festive Velvet Rub-Ons  126
Z1742 Parlor Velvet Rub-Ons 126
Z1407 6" x 6" Olive Quick Pic™ Album 122
Z1408 6" x 6" Pansy Purple Quick Pic™ Album 122
Z1054 My Creations® Display Album 132
Z1378 My Creations® Banner 132
Z1614 My Creations® Memory Game 132
Z188 Craft Jars 120
Z1352 4 1/2" Colonial White Circle Cards 123
Z1353 4 1/2" White Daisy Circle Cards 123
Z1731 My Originals® Sweet Surprises Card Kit 123
X7147B My Reflections® Stella Paper Packet 68
X7148B My Reflections® Pemberley Paper Packet 68
X7150B My Reflections® Victory Paper Packet 69
X7153B My Reflections® Florentine Paper Packet 69
X7158B La Belle Vie Paper Packet  38
X7160B Flirty Paper Packet 50
X7161B Moonlight Paper Packet 56
X7162B Pear & Partridge Paper Packet 62
Z1252 Cutting Knife 135
G1041 Workshops on the Go® Avonlea Cardmaking Kit 22
G1043 Workshops on the Go® Pear & Partridge Cardmaking Kit 66
G1040 Workshops on the Go® Spellbound Cricut® Kit 14
G1042 Workshops on the Go® Scroll Album Kit 23
G1044 Workshops on the Go® Advent Calendar Kit 67
G1045 Workshops on the Go® Avonlea Scrapbooking Kit 21
G1046 Workshops on the Go® Clementine Scrapbooking Kit 29
G1047 Workshops on the Go® Dakota Scrapbooking Kit 35
G1048 Workshops on the Go® La Belle Vie Scrapbooking Kit  41
G1049 Workshops on the Go® Scholastic Scrapbooking Kit 47
G1050 Workshops on the Go® Flirty Scrapbooking Kit 53
G1051 Workshops on the Go® Moonlight Scrapbooking Kit 59
G1052 Workshops on the Go® Pear & Partridge Scrapbooking Kit 65


Item # Item Description Page # Spring/Summer 2012 Idea Book
A1104 A Tweet 90
A1111 A Tulip 68
A1116 A Melody 94
A1122 Bravo 92
A1128 Quick Cards—Shell 80
A1129 A Rainbow 85
B1365 Spring Up 71
B1369 Rosy Regards 67
B1374 Bee Happy 83
B1397 He Is Risen 74
B1402 My Peeps 72
C1439 Enjoy Life 95
C1440 Take a Picture 93
C1442 Tailor-Made 94
C1450 Eclectic Edges 99
C1452 Delight 71
C1455 Aspire 96
C1456 Heartfelt Treasures 68
C1457 Happy Camper 84
C1458 Paper Lantern 90
C1473 Remarkable Wreath 70
C1474 10 Things 105
C1485 Super Powers 47
C1498 Country Life 82
C1499 Perfect Day 80
D1195 The Works Alphabet 117
D1222 Tiny Typewriter Alphabet 117
D1296 Chocolate Alphabet Small 114
D1301 Hodge Podge Alphabet 114
D1303 Classmate Alphabet 114
D1462 Splendid Day 77
D1464 Card Chatter—Love 106
D1467 Trees & Things 76
D1472 Simple Memories 66
D1478 Bingo Alphabet 113
D1505 Roar! 89
D1508 Diverse Backgrounds 102
D1509 Magic Adventures 78
D1511 Kick Back 81
E1013 Field Trip Alphabet 114

Saturday, December 15, 2012

Joy to the World


It is snowing here and absolutely beautiful outside. It almost feels like a blessing after yesterday's tragedy in Newtown, CT. My heart still hurts for the families of those lost but the snow is a beautiful reminder that the world is good.

Today's little project is to remind us of the same. This is a joyful time of year and the snow is so complementary to these darling Joy blocks. The lovely Renae Fennema designed these using our Monogram stamps, Avonlea papers, the beautiful slate satin polka-dot ribbon, and My Creations Blocks. I'm considering taking four blocks, using the same papers and making some that say Snow.


By the way, if you love Monograms, watch this little video. It gives great inspiration with our Monogram stamps. So much fun!


May you all have a joyful and beautiful day! Hug your loved ones tight and enjoy the season!

Wednesday, December 12, 2012

Happy 12/12/12!


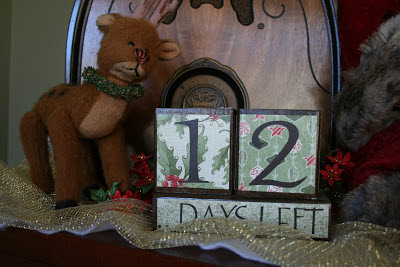
It's the 12th day of the 12th month of the 12th year of this century! And, if she cooperates, the birthday of my newest niece! And only 12 days left until Christmas! Wow! Sounds like a day to celebrate to me. And so I am celebrating. I have taken the day off work, I'm scrapping the year 2012 (part of Stacy Julian's 12/12/12 class at BigPictureClasses.com), and just enjoying the day.

Wishing you all a fabulous 12/12/12!

Friday, December 7, 2012

Christmas Cards


I am a big fan of both sending and receiving Christmas cards. I know some people think it is a hassle, I know some people prefer to do something online, but I love getting happy mail. It's such a nice thing to open your mail box and have something other than junk mail, bills and magazines. So I faithfully send out cards every year. And yes, I do try to make them.

In the old days, my Christmas cards were pretty elaborate. As life got more crazy, I've learned to keep them simple. So I'm toying with three different cards this year. Which is your favorite?


The first is the simplest--just the basics, white card base, stamps and ink. The second is the most involved with the twine, but you gotta love the twine! And the third is a good balance between the two. I'm kind of leaning to the third.

If you are thinking of making cards this year but don't want to spend too much time, you might want to check out the CTMH Pear & Partridge card kit. It really does make card making faster, simpler and easier! And there's still time to get it before Christmas!

Have yourself a Merry Little Christmas!

Saturday, December 1, 2012

Happy December 1st! Let the Countdown Begin!


December is upon us! And with it, I am unleashing the full Christmas force!

First of all, be sure to check out the shopping link on my website, blythe.ctmh.com. Today, there are new items at a significant discount added to the While Supplies Last section. You may want to get some Christmas shopping done while the deals last! And this month, for every $50 purchased, you'll get a free bonding memories glue with your order.

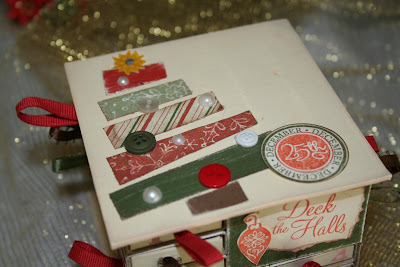
And now, are you ready for the Christmas countdown? I have at least seven advent calendars (there may be a couple more boxed up). We like to anticipate Christmas around here. Here is a fantastic little advent calendar that you could pull together for fun.


I don't have tutorial photos as I made this one a while ago but hopefully, I can explain it in such a way that you could make it yourself. If not, ask me any questions. I'm happy to help out.

You'll need the following:

  • 24 matchboxes (I just bought the inexpensive mini matchboxes at the grocery store and dumped out the matches--we tried to light them all at once thinking it would make a fantastic fire but were a bit disappointed).
  • 2 pieces of chipboard or thin wood for the top and bottom (mine were cut at 4x4--it will all depend on the size of your matchboxes)
  • Acrylic paint--I used antique white
  • Miscellaneous bits of paper, stamped items, buttons, sparkles, doo dads and other fun things for decorating the matchboxes
  • Ribbon or something to use as pulls for the finished matchbox drawers
  • Number stamps or a good pen for putting numbers on the drawers

Paint the inside of the matchboxes (the part that will be the drawer) on all sides and the chipboard. I did not paint the outer part of the matchbox as I planned on covering that up but you could depending on how you decide to decorate. Make sure the inside of the matchboxes are dry before you put them back inside so they don't stick.

On the first piece of chipboard, glue your first four matchboxes. Place them to form a square so that one matchbox opens to each side. Glue another layer of matchboxes on top of that one and then one more on top of that so you have three drawers opening on each side. Now, reverse with your next layer so that the drawers will be on the opposite corner of the stack opening out (for example, three drawers on the bottom right, three now on the top left). Glue the next two layers on. Now glue on the final piece of chipboard for the top.

Decorate! I put cardstock or patterned paper on the sides of the matchboxes so that didn't show. I stamped numbers on the front of each drawer and punched a tiny hole through which I inserted ribbon (knotted on the inside) to use as drawer pulls. I added accessories to decorate and make it Christmasy. Fun and easy and not terribly expensive. And besides, you just got yourself a supply of matches.


The drawers are tiny but a lifesaver or a similarly sized candy fits inside perfectly. If you wanted to make this with bigger matchboxes, you could put some much bigger prizes inside (keeping in mind it would be a much bigger advent calendar).


Happy Counting Down to Christmas!