Showing posts with label Cricut Artbooking. Show all posts

Monday, August 18, 2014

Lucy

My niece, Lucy, has got to be the cutest baby on the planet. Well, she's three now so she's the cutest toddler on the planet. But being caught up is not the point, right? Being inspired is the point. Anyway, I created this little folder album using the Cricut Artbooking cartridge for a convention class I did last year. I had a blast playing around with different sizes to see what the folders looked like. And then, inspired by Heidi Swapp, I made a mini album with the folders featuring the one and only Lucy.


Seriously, this little one is a true original. Love her!

Happy Stamping and Scrapping!

Thursday, October 31, 2013

Happy Halloween!

Happy Halloween from me and my monsters! Okay, so there aren't any scary monsters. Just one lovable, blue, cookie loving one.

 Here's another Halloween monster for you!


And  here's a little Halloween treat and a joke to go with it (I've been texting my kids Halloween jokes all day and they all think I'm weird).


Who won the skeleton beauty contest?


No Body! Mwahahaha!

The darling Emily Anderson made both of these projects and I so appreciate her sharing them with me!

Have a spooky and safe Halloween!

Tuesday, October 8, 2013

A Halloween Layout

In October, I usually try to do at least one Halloween layout for my Cherish Your Memories scrapbooking group. However, this year, Close to My Heart didn't have a Halloween themed paper packet. So I looked at the colors of the various paper packets and toyed around with which paper could be most easily manipulated to work for Halloween (we are nothing if not versatile in the scrapbooking business). And then I saw a layout by my friend, Launi Layton utilizing the Sarita paper packet. And then I saw that layout as manipulated by my friend, Jen Mahan. So what did I do? I scraplifted the idea from both of them and manipulated the layout even more to make it my own. So here it is--my twist on a Sarita/Halloween layout for this month's Cherish Your Memories Class.


The Cricut Artbooking Cartridge was a must for this one. Use real dial size for some of the images and Cricut craft room to create the outline of the Haunted House. 

If you've never come to a Cherish Your Memories Class, you really should. We meet once a month in Salt Lake City and once a month in Provo and we have a great time. You get to have a fun with a group of people that love scrapbooking and you go home with four finished scrapbook pages (you just add the pictures). Contact me for time, place and cost. Here is the second layout we'll be doing on a non-Halloween theme.


We'd love to have you join us!

Saturday, August 17, 2013

Playing with Mixed Media

Most of the time, I am a paper, glue, ink and scissors type of gal. Once in a while I may dabble in paint but that's getting pretty brave for me.

However, after playing with a little mod podge back in March, I decided there was a whole world of creativity out there waiting to be experienced. So, I recently dabbled a bit. And here was my result.


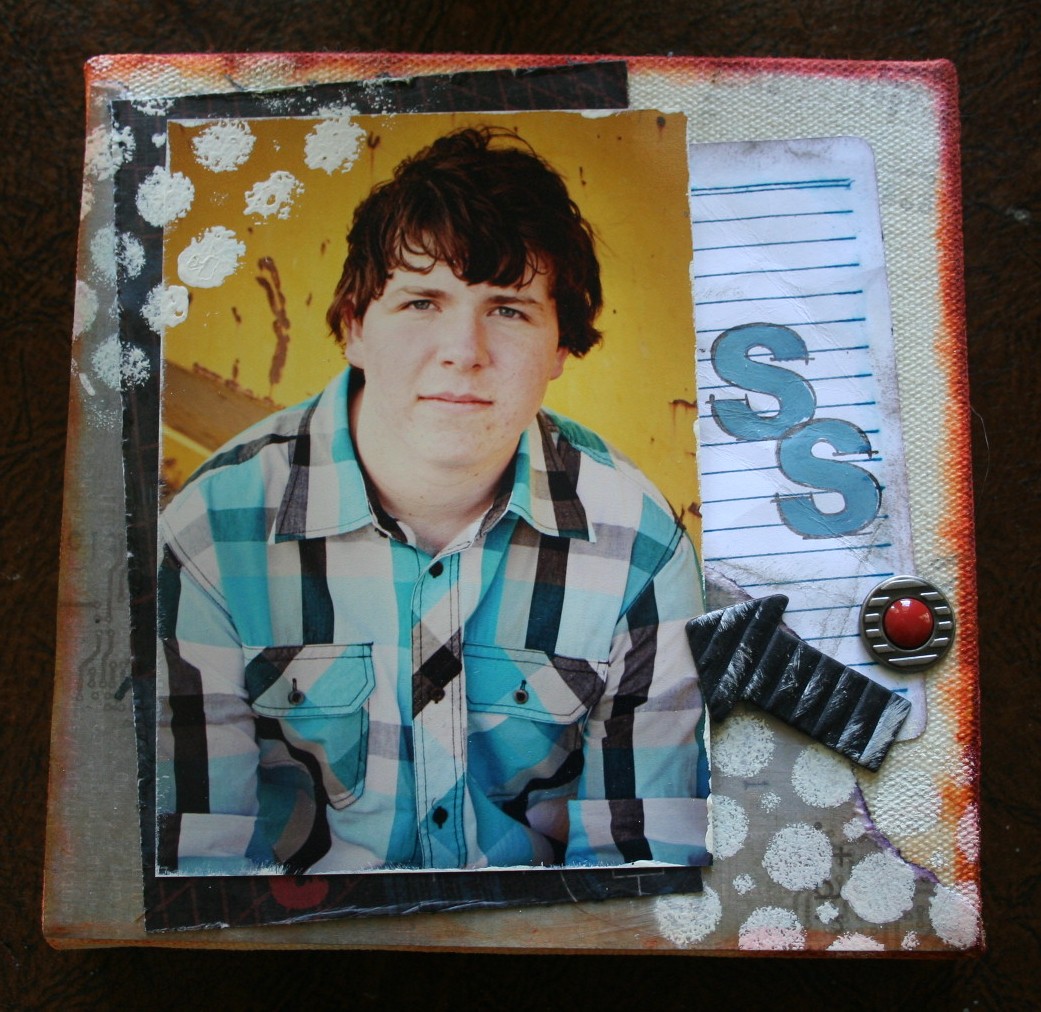
I started with 6x6 canvases. I cut overlays from the Cricut artbooking cartridge and used those to stencil with some acrylic paint (I mixed white with reinkers to get custom colors). Add some Proplayer paper and Proplayer assortments, the notebook paper stamp from the Cricut Artbooking collection stamp sets (this has got to be my favorite stamp and Cricut cut) and the new Framework Alphabet Stamps and these were actually pretty quick.  Avoid using mod podge or any multi-medium directly on the stamped images unless you are using pigment ink and avoid using the multi-medium on photos. It's not pretty. I am definitely not the expert on this but I am having fun with it.


 I'm wrapping up a Claudine Hellmuth class on Big Picture Classes so there may be some more mixed media appearing on this blog in the future. I really am enjoying it. But know you can always count on me for paper, scissors and ink creations. Always.

Friday, August 2, 2013

New Product Blog Hop!

Everyone loves a blog hop and I was excited to join this one sponsored by the amazingly talented, Tresa Black. She and I both taught the same packet, ProPlayer, at the Close to My Heart Convention in June so it was so much fun to see what she created.  

I believe I told you in a previous post that my friend, Colette Wagstaff, took my kids out for a photo shoot in preparation for my class. I needed some great photos that would look fabulous with the ProPlayer paper (my kit for convention). She did not disappoint and my kids and their friends had a blast. There were so many good photos that I had a hard time choosing. The easiest way to use some of my favorites was in a mini album format. This is a photo frame that I picked up at Ikea. Close to My Heart has a new flip stand album you can see here that is new to the catalog but I didn't know about it when I created this. Now I'm excited to create one with Close to My Heart's version. I may have to ask Colette to do another photo shoot.


I used the new Cricut Artbooking Cartridge on all of these pages. These are the file folders available on the 5 and 6 keys (7x5 Top Secret Mini Album). I cut them in half, using one half of each file folder for a page. The file folders are cut at the recommended size but I did all sorts of experimentation with real dial size for many of the other images. Don't you just love that "Oh Snap"?


Besides the ProPlayer papers, we have lots of accessories going on here. I used a lot of my leftovers at this point (this was one of my last projects). This page has the ProPlayer Assortment and the Irresistibles Hexagons.


Remember to save those leftovers. The Chevrons are leftovers from cutting a Chevron overlay on key 7. The stamp is one of the Cricut Artbooking Collection Stamp Sets. You get three different sets plus chipboard with the cartridge.


A little Base & Bling, a little Ruby Chevron ribbon, a little red Shimmer Trim.


Love the Be Yourself. Pop a little honey cardstock behind it and it makes it pop!


More Base and Bling Word Accents with a little Ruby Mini Medleys thrown in. Love the LOL, again from the Cricut Artbooking cartridge.


A little Abbey Road going on here. The saying is from the Maximum Power stamp set. The sun overlay is from key t (6x7 Summer Mini-Album). The sequins are from the Black Mini Medleys. It includes individual sequins, with adhesive already on them. Brilliant! I used a few on the next page.


Love the overlay I used in the background. I experimented with real dial size on key 3. This was a leftover from some of my testing. Just goes to show that sometimes it does pay to hoard leftovers. The good Times stamp is from another of the Cricut Artbooking Collection stamp sets.

This was actually a quick project when I got down to it. It was a great use for leftover cuts and accessories and a great way to display some fun photos that hadn't been used on scrapbook layouts. I even created one of these for the Operation Smile auction held at convention. Good times.

Now hop on over to other blogs to see more new product from the Autumn/Winter Close to My Heart Catalog.

Note: To join the blog hop, you must be a member of the CTMH Blog Boosters. Please do not add an entry to the blog hop if you are not a member of the group. However, please do check out the links to the other blogs and their great ideas!

Thursday, July 25, 2013

A Sneak Peek at the Cricut Artbooking Cartridge by Close to My Heart

Where has the month gone? It has flown by since I got home from convention. Just a reminder that the end of the month brings the end of two really great specials. Don't forget that the Courage and Home of the Brave stamps sets are only available until the end of the month and the purchase of each donates money to the USO to support our troops. And the Work Your Workshop special, featuring the Workshops on the Go Canvas Kit at half price is only available while supplies last or until July 31st. So take advantage of those today.

And with that reminder out of the way, how about a sneak peek at the upcoming Close to My Heart Cricut Artbooking Cartridge? I got a chance to play with this cartridge in preparation for my convention class and it is fabulous. First of all, this isn't your ordinary cartridge. While it has all sorts of wonderful images, as every Close to My Heart Cricut cartridge does, this one has all sorts of layout and mini book themes! By setting the Cricut machine to the suggested dial size, you can use one key (yes, one) to cut out accents, borders, titles, overlays and more, all in proportion, to create the perfect scrapbook or mini album page. It's so simple! And by using real dial size and a little creativity, you can manipulate those images and overlays for all sorts of additional fun stuff.

So let's take a look at a card I made with the cartridge.

First of all, I cut the photo mat on the N key from Honey cardstock. I stuck with the recommended dial size on this one which is actually 11". Notice the photo mat is not 11" but rather in proportion with the overall 12x12 layout. This has a photo mat box for a 4x4 photo. It is a great size for a card as well.
Next, I cut the border shown here in various colors (Pacifica, Ruby, Slate and Black) because I wanted to use, not the border, but the arrows left over from the border. I also cut the larger arrow in Ruby and Slate.
I layered the arrows, including the arrow cut from the photo mat, randomly on a piece of white cardstock cut at 4 1/4 x 4 1/4", just a tiny bit larger than the opening of the photo mat.
I used the little arrow from the new "All the Details" stamp set and...
...I stamped it in Ruby ink to fill in any leftover white space on my white cardstock.  I then layered the honey photo mat over the white cardstock and mounted that on black cardstock on a card base.
There was a teeny bit of left over glue after gluing down the arrows so I used my handy dandy Rub and Remove Eraser to clean it up. 
After adding the Real Life from All My Details stamped in Pacifica ink I'm all done! I really like how this card turned out. Now I'm trying to think of a clever saying to put in the middle. Something inspiring to do with real life and directions... Any suggestions?

Happy Stamping and Scrapping!